the last word

Photography meets digital computer technology. Photography wins -- most of the time.

  • site home
  • blog home
  • galleries
  • contact
  • underwater
  • the bleeding edge
You are here: Home / The Last Word / Atmospheric thermal turbulence demo

Atmospheric thermal turbulence demo

May 17, 2018 JimK 4 Comments

I’ve talked before in the context of lens testing about atmospheric turbulence and how it can wreak havoc on otherwise well-conceived testing. I try to avoid doing testing over great distances, but if I’m going to be doing such work, I try to do it first thing in the morning before the sun warms the earth. I always check for turbulence by setting the camera to maximum magnification and making sure everything in the finder is dead still.

Today I made a little demo of turbulence effects on image quality. I took a Sony 100-400 mm lens and the Sony 1.4x teleconverter and put them on an a7RIII. I set the ISO to 100. I set the lens to 400 mm, which gave me an effective 560 mm reach, and picked an effective aperture of f/11. That made the shutter speed 1/125. I hooked a remote release to the camera, set the shutter to single shot silent shutter (fully electronic shutter, to reduce vibration, and I aimed it across the valley near my house:

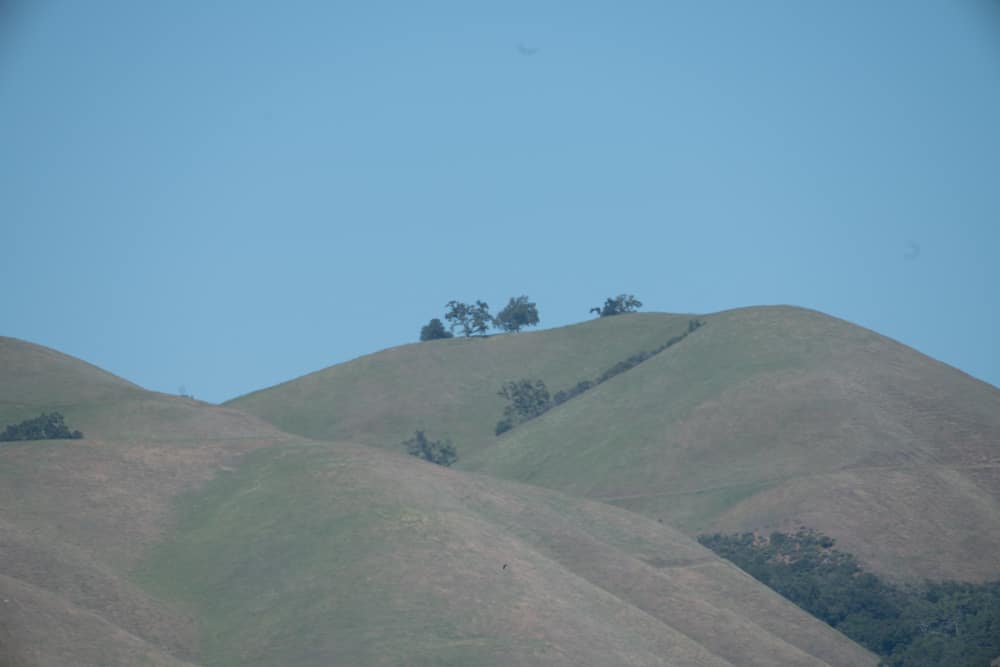
Today was a cool day for May, with atmospheric turbulence below what it is when the sun is higher and the marine layer is not letting the air stay in one place long enough for the sun to heat it up a lot. Still, there was a good deal of motion in the finder. I focused and fired off twenty shots with the remote release, about half a second apart. Then I made an animated GIF, which you can see below. It’s a tight crop — tighter than I would have like so that I could get the size down. It’s also only 10 of the frames, for the same reason. I set the GIF frame rate to 2/second, so you’ll get kind of a real-time look.

You will note that the amount of blur at any point in the image varies from frame to frame. Heck, the size of features in the image varies from frame to frame. At a higher shutter speed, the blur variation would have been even greater. Not good for lens testing, or long-lens landscape photography, for that matter.

The Last Word

← Debunking false claims about Sony a7III PDAF striping A promising idea, a disappointing outcome →

Comments

  1. Christer Almqvist says

    May 18, 2018 at 1:27 am

    Clear, the demonstration of the effect.

    And one experiment of yours where I immediately grasped the technique used.

    Many thanks.

    Chris

    Reply
  2. Jack Hogan says

    May 18, 2018 at 1:36 am

    Cool. You can almost see the thermal waves by watching the land-sky interface to the right of the tree.

    Reply
  3. Pieter Kers says

    May 22, 2018 at 1:09 am

    I spoke to someone of Nikon that told me this was one reason tele lenses are not optimized for infinity, but for closer distances.

    Reply
  4. AndrewZ says

    May 23, 2018 at 1:15 am

    Now if you merged all the images and then set up some deconvolution you may be able to sharpen it up considerably

    Reply

Leave a Reply Cancel reply

Your email address will not be published. Required fields are marked *

March 2023
S M T W T F S
 1234
567891011
12131415161718
19202122232425
262728293031  
« Jan    

Articles

  • About
    • Patents and papers about color
    • Who am I?
  • Good 35-70 MF lens
  • How to…
    • Backing up photographic images
    • How to change email providers
  • Lens screening testing
    • Equipment and Software
    • Examples
      • Bad and OK 200-600 at 600
      • Excellent 180-400 zoom
      • Fair 14-30mm zoom
      • Good 100-200 mm MF zoom
      • Good 100-400 zoom
      • Good 100mm lens on P1 P45+
      • Good 120mm MF lens
      • Good 18mm FF lens
      • Good 24-105 mm FF lens
      • Good 24-70 FF zoom
      • Good 35 mm FF lens
      • Good 60 mm lens on IQ3-100
      • Good 63 mm MF lens
      • Good 65 mm FF lens
      • Good 85 mm FF lens
      • Good and bad 25mm FF lenses
      • Good zoom at 24 mm
      • Marginal 18mm lens
      • Marginal 35mm FF lens
      • Mildly problematic 55 mm FF lens
      • OK 16-35mm zoom
      • OK 60mm lens on P1 P45+
      • OK Sony 600mm f/4
      • Pretty good 16-35 FF zoom
      • Pretty good 90mm FF lens
      • Problematic 400 mm FF lens
      • Tilted 20 mm f/1.8 FF lens
      • Tilted 30 mm MF lens
      • Tilted 50 mm FF lens
      • Two 15mm FF lenses
    • Found a problem – now what?
    • Goals for this test
    • Minimum target distances
      • MFT
      • APS-C
      • Full frame
      • Small medium format
    • Printable Siemens Star targets
    • Target size on sensor
      • MFT
      • APS-C
      • Full frame
      • Small medium format
    • Test instructions — postproduction
    • Test instructions — reading the images
    • Test instructions – capture
    • Theory of the test
    • What’s wrong with conventional lens screening?
  • Previsualization heresy
  • Privacy Policy
  • Recommended photographic web sites
  • Using in-camera histograms for ETTR
    • Acknowledgments
    • Why ETTR?
    • Normal in-camera histograms
    • Image processing for in-camera histograms
    • Making the in-camera histogram closely represent the raw histogram
    • Shortcuts to UniWB
    • Preparing for monitor-based UniWB
    • A one-step UniWB procedure
    • The math behind the one-step method
    • Iteration using Newton’s Method

Category List

Recent Comments

  • JimK on Sony 135 STF on GFX-50R, sharpness
  • K on Sony 135 STF on GFX-50R, sharpness
  • Mal Paso on Christmas tree light bokeh with the XCD 38V on the X2D
  • Sebastian on More on tilted adapters
  • JimK on On microlens size in the GFX 100 and GFX 50R/S
  • Kyle Krug on On microlens size in the GFX 100 and GFX 50R/S
  • JimK on Hasselblad X2D electronic shutter scan time
  • Jake on Hasselblad X2D electronic shutter scan time
  • Piotr Chylarecki on Who am I?
  • JimK on Who am I?

Archives

Copyright © 2023 · Daily Dish Pro On Genesis Framework · WordPress · Log in

Unless otherwise noted, all images copyright Jim Kasson.