Phase One just introduced an update to the IQ4 cameras that allows in-camera capture and averaging of groups of images. If the camera position is fixed, this technique can have the effect of simultaneously:
- Allowing long exposure times without the need for a neutral density filter.
- Deceasing the amount of noise in the final image over what could have been achieved with a single capture.
- Increasing the dynamic range of the final image over what could have been achieved with a single capture.
2, and 3 above are really just two different ways to say the same thing. The amount of noise reduction is the square root of the number of captures. If you have 2 captures, you have 0.707 times as much noise. Four captures, half the noise. 16 captures give you one quarter the noise, and 64 captures get you to one eighth.
I’ve been doing this for some time in post-production. If you want to experiment with it and you are among those who don’t happen to have an IQ4, but do have Photoshop (Ps), it’s pretty easy.
Here’s what to do.
Bring all your images into Ps as layers in a single image. If you’re using Lightroom (Lr), you can select all the images and pick “open as layers in Photoshop”.
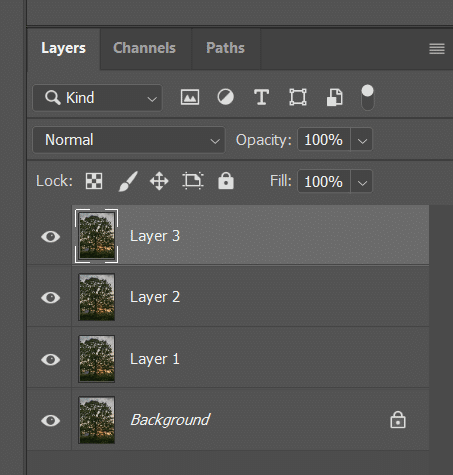
Select all the layers.
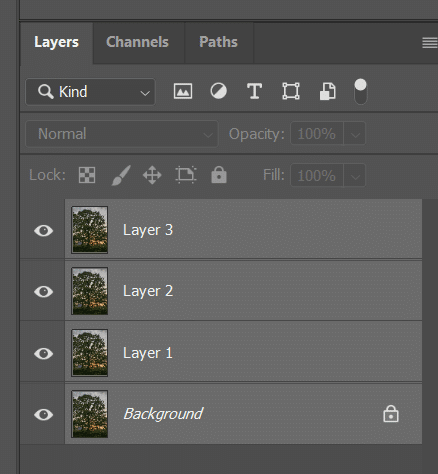
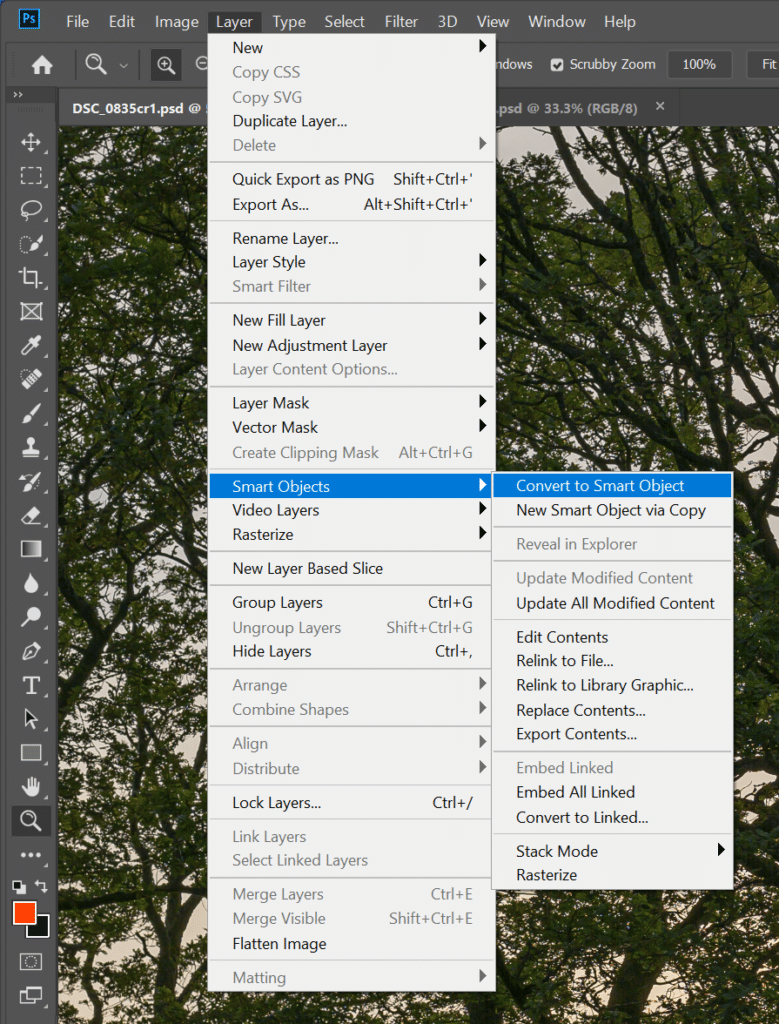
Convert the layers to a smart object.
In Smart Object, pick Stack Mode, and then Mean.
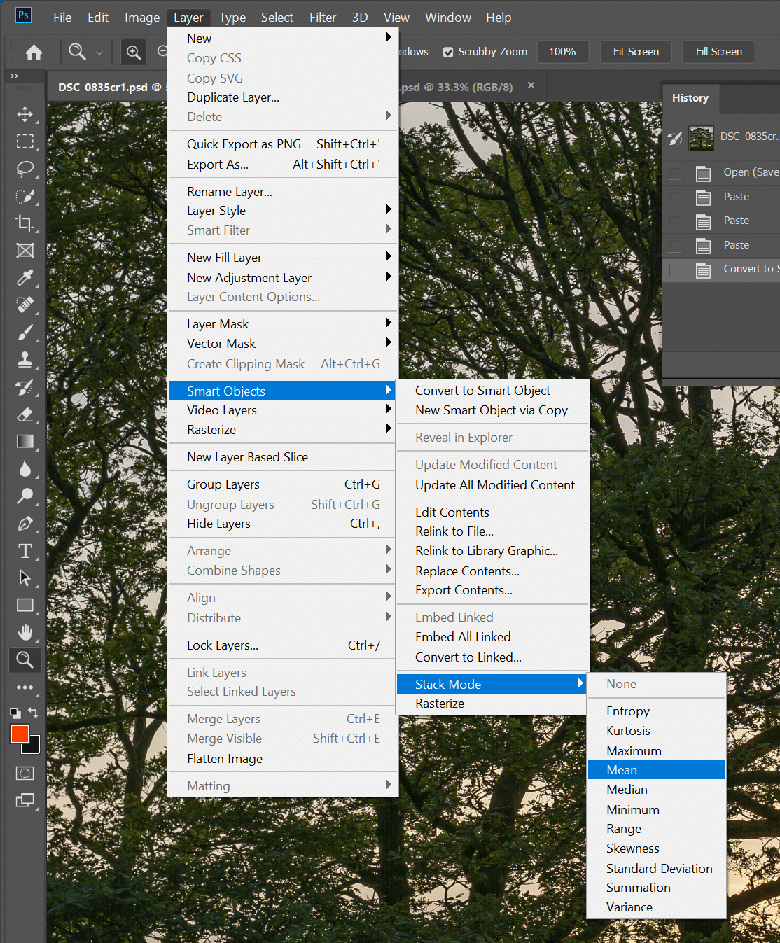
If you want to experiment, you can also choose Median.
Phones have done this for quite a while as well, but instead of plain stacking they align the images in blocks.
When shooting handheld, you may have to shoot with higher ISO and thus introduce more noise in the picture. If you precede the steps described in your link with an Edit->Auto Align step, you can use the image averaging technique on handheld shots and reduce noise. How many shots would be necessary to get the noise behavior of the base ISO?
Let’s say ISO 100 is the base ISO. Then it would take two shots at ISO 200, four shots at ISO 400, or 16 shots at ISO 1600. But if you’re just worried about shadow noise, you could get similar results in fewer shots by bracketing and using HDR in post.
Thanks for the reply. Assuming that I am shooting handheld at the lowest possible shutter speed, there is not much opportunity to bracket in both directions
FYI, an even easier approach is to go to File -> Scripts -> Load Files into Stack, then check the boxes to auto-align the selected files (or folder of files) and create a Smart Object.
I photograph mostly at night, using long exposures at base ISO, so median-blend multiple files (odd numbers, so no computation is required to determine the median values) for every photo I take to reduce shadow noise, as well as automagically remove star trails, airplane or car lights, pedestrians, etc. from the final, blended file.
Hi Jim
Could you explain the #1 point ” Allowing long exposure times … ” ?
Thank you very much.
JPierre
Without a ND filter, the longest exposure time is limited by the minimum acceptable aperture and clipping at the chosen ISO setting. If you are averaging many exposures, you can pick the shutter speed for each one to be short enough to avoid clipping, and when you average the series, it will look like you used a longer exposure.
Here’s an example: say you are taking twilight pictures of a seashore with clouds in the sky. You want the water to be smooth and the clouds to have motion blur. You figure that will take a 120 second exposure. You don’t want to stop down any further than f/11. At f/11 at base ISO, the capture will clip with an exposure longer than one second. You can either use a ND filter and make one shot at 120 seconds, or not use one, and make 120 1-second exposures and average them.
Caught it ! :o))
Thanks a lot Jim.
JPierre
Sounds like Sony’s PlayMemories app for the previous generations of cameras? Something Sony should bring back!
In Photoshop, it’s usually faster to go the way of File/Statistics menu and do the stacking from there than muck around with layers and smart objects. I don’t know how PS operates internally, but it seems to make an internal copy of the stack when using smart objects – and with deep stacks, this quickly becomes resource intensive and/or slow.
If you have many images, like simulated long exposure stack can have, and your camera is supported, and you don’t mind the potential loss of bit depth, piece of software called PixelFixer can do the stacking in some seconds per hundred images. It saves the stacked image as a native camera raw file (.nef for Nikon, etc). I’ve fed it stacks that are 200 images deep and it processed them in less than 30s. Truly magnificent piece of software – it also can do flat field and dark frame correction if you have the calibration images. Too bad that it hasn’t been updated in a while and doesn’t seem to be open source…
However, if you don’t have a camera that is supported by PixelFixer and you have deep stack of images, then I recommend either Imagemagick or Hugin’s hugin_stacker; the latter is somehow even quicker in its operation than Imagemagick is and integrates well with Hugin itself. I’ve done spherical panoramas, where I’ve aligned the sky to stars and the ground to the foreground so that the final panorama can have both pinpoint stars and less noise in the whole image. hugin_stacker supports several stacking modes, including your min, max, average, median and winsorized mean; the latter can be useful when stacking images of deep space since it magically gets rid of satellite trails and such without hurting the signal/noise ratio like median stacking can do.
One way to peruse stacking is to do super resolution. Shift the camera around a tiny, random amount (poke it with a finger, let the mirror slap do its thing, etc), and then align the images with subpixel precision. After that is done, average the images with 2x pixel scale and bayer artifacts such as false colours and remains of the colour filter array pattern in the image are gone. Of course, the results usually aren’t as good as with dedicated pixel shift sensors, but improvements are usually seen nonetheless – if not anything else, the signal to noise ratio is better.