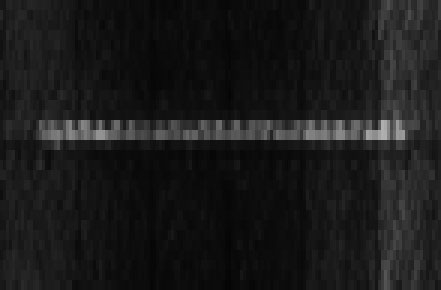
I came up with a way to explore the camera vibration that is degrading the images in the previous post. I set up an oscilloscope about 30 feet away from the D800E, mounted as before on the StackShot rail and the RRS TVC-34L Versa Series 3 tripod with RRS BH-55 ball head. I turned down the intensity to minimize CRT blooming, and I set the horizontal time base to 100 milliseconds per division. I focused the Zeiss 100mm f/2 ZF lens with live view, and set the shutter speed to ½ second, which would give me five divisions of exposure. I made ten images with each shutter tripping regime so that I could find images for each where the trace started on the left side of the oscilloscope screen.
Here’s a full frame sample image:
I brought the images into Lightroom, converted them to black and white, then exported then to Photoshop as layers. In Photoshop, I cropped the images and boosted the contrast, then res’d them up 300% horizontally and 1000% vertically, so you can see the individual D800E pixels.
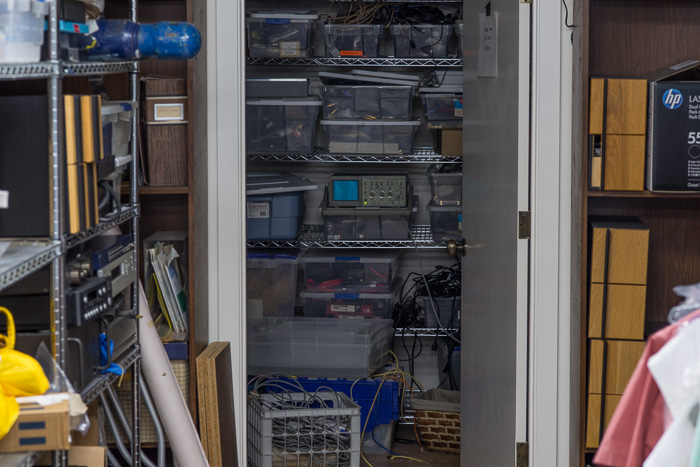
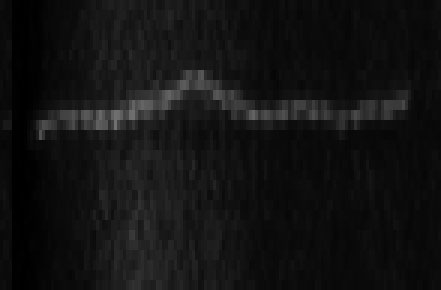
First, hand release with the camera in a horizontal (landscape) orientation:
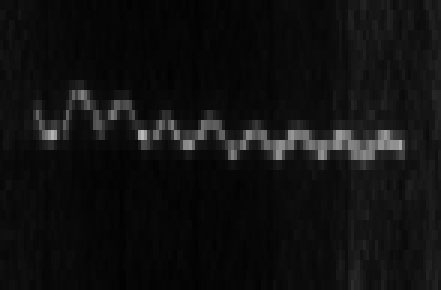
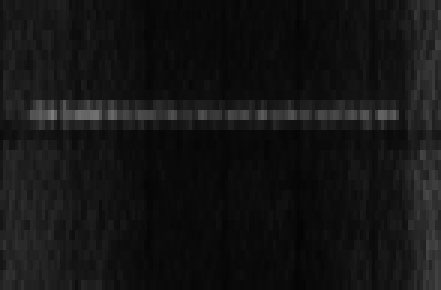
And in a vertical (portrait) orientation:
In the horizontal orientation, there is a damped sinusoidal oscillation at about 20 Hz, superimposed on an exponential. There is about a two or three pixel peak-to-peak oscillation at the end of the ½ second shutter opening. In the vertical orientation, there are a couple of cycles of a 5 Hz vibration, followed by a two or three pixel peak-to-peak signal. Clearly, hand release is pretty bad if you want sharp images.
Using a remote release looks like this with the camera oriented horizontally:

and like this with the camera oriented vertically:

The 20 Hertz vibration in the horizontal mode (that means it’s a vertical vibration) remains. It’s just smaller. There’s a similar horizontal vibration of slightly less amplitude.
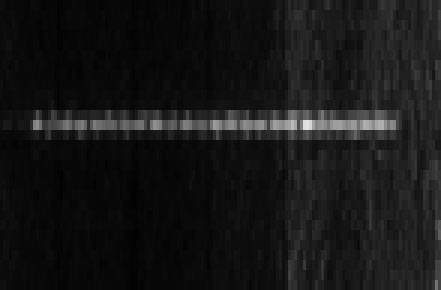
Releasing the mirror, waiting three seconds, and manually tripping the shutter looks like this with the camera oriented horizontally:
And like this with the camera oriented vertically:
It’s better than with the mirror down – the 20 Hz vibration is smaller – but there’s evidence of vibration induced by my hand.
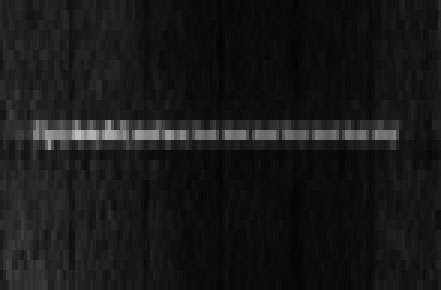
Releasing the mirror, waiting three seconds, and remotely tripping the shutter looks like this with the camera oriented horizontally:
And like this with the camera oriented vertically:

There are vertical vibrations of two or three pixels peak-to-peak in the 20 to 50 Hz region, and horizontal vibrations of one or two pixels peak-to-peak in the 20 to 50 Hz region.
Using the three-second shutter delay with the wired remote release looks like this with the camera oriented horizontally:
And like this with the camera oriented vertically:
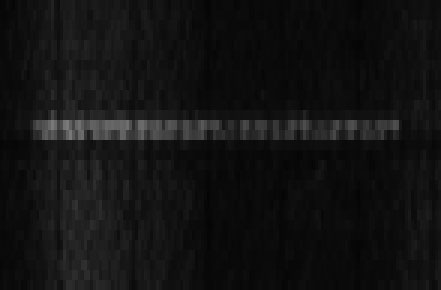
There’s a two to three pixel peak-to-peak 20 to 60 Hz vertical vibration, and a somewhat smaller, but similar, horizontal vibration. There is almost no evidence of vibration from the opening of the shutter.
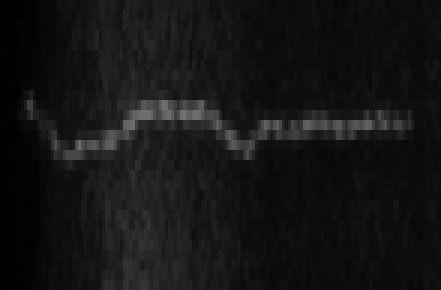
Using the three-second shutter delay with a manual release looks like this with the camera oriented horizontally:
And like this with the camera oriented vertically:
The results are similar to those with the remote release.
So, it appears that there are several ways to release the shutter without introducing much vibration, with the 3-second shutter delay being the most convenient. However, there also appears to be some residual vibration that is independent of the shutter opening. Is that the oscilloscope spot moving up and down slightly? Is it 60-Hz electrical vibration coupling through the concrete floor to the tripod? Is the focused spot really about the same size as a pixel? Or am I looking at sub-pixel vibration broadened by demosaicing interpolation?
All good questions.
Leave a Reply