In the fall of 1958, when I was a photographer for my high school newspaper, I borrowed a Linotype font chart from the newspaper office, taped it to the darkroom wall, lit it with two blue-dipped photofloods, metered it with a Weston Master II, and made a bunch of handheld exposures at various shutter speeds with my Nikon S2 and a 5cm f/2 Nikkor, the only lens I had for the camera, which I’d used an entire summer’s wages to buy used from a real, salary-earning newspaper photographer.
The objective of my test was to see what shutter speeds were useable. I didn’t know about diffraction except as an abstract concept in physics, and I’d never heard of a variable neutral-density filter, so I just stopped down as I slowed the shutter speed. I blew a whole 36-exposure roll of Plus-X on the project — $1.15 down the drain. I souped the film in Microdol, washed it for a few minutes, blasted it with 180-degree heat in the film dryer, cut it into strips of six, and printed a bunch of frames with an Omega D2 enlarger with a condenser head that emphasized the heck out of the grain. I brushed identifying marks on the single-weight Kodabromide F exposed papers with fixer before I dropped them into the Dektol so I could keep track of what was what. I dried the prints on a ferrotype plate so hot that it sizzled – a minute or less per print; these weren’t going to have to last very long.
Then I sat down with the 8x10s and tried to figure out what the smallest font was that I could read at each shutter speed. It was a humbling experience. All my friends said they could handhold at speeds slower than I had just demonstrated to myself that I could, although, to be fair, their standard was a 3×5 inch image with a 133-line screen (we didn’t print on newsprint).
Enough nostalgia. More than fifty years on, a lot has changed, but much is the same. The Imatest MTF testing that I’m doing to gain insight into my ability to handhold the a7, a7R, and D800E is not so different in concept from the Linotype font shots. Both measure resolution. The Imatest analysis provides more objective and repeatable results, and allows a wider variety of criteria – MTF50 is just a starting place. The font target actually required more accurate alignment. I’ll get to that soon.
In order to make sense out of what I’m doing with Imatest in this exercise, and how it differs from the usage of the program that has been described on the Lensrentals web site and in places on the Imatest site, I’ll talk about how a lot of people use the program, and the way I’m using it.
The SFRplus charts that Imatest recommends you use for most purposes have similar patterns at various places. If you fill the frame with the chart, the program can perform many different analyses on one shot, and can, by analyzing how various measurements change at various locations on the captured image, map resolution as a function of position in the image, measure lens distortion, and the like. You need to make sure you’re aligned properly or perspective distortion can be confused with lens distortion, and having a plane of focus that’s not the same as the target plane can make it look like you have a lens with a decentered element.
That’s one of the reasons that a tripod is recommended for this kind of testing. Camera shake can mask the resolution limits of the lens. That’s another reason to use a tripod. But having to make only one shot and getting many measurements is a big time-saver, and you’re doing a lot of testing, it’s a convenient way to work.
That’s not what I’m doing. I am using a SFRplus target, but I am not filling the frame with it. On the contrary, with the size I print it and the distance I’m using with 55mm and 58mm lenses, it sits forlornly alone in the center of the frame.
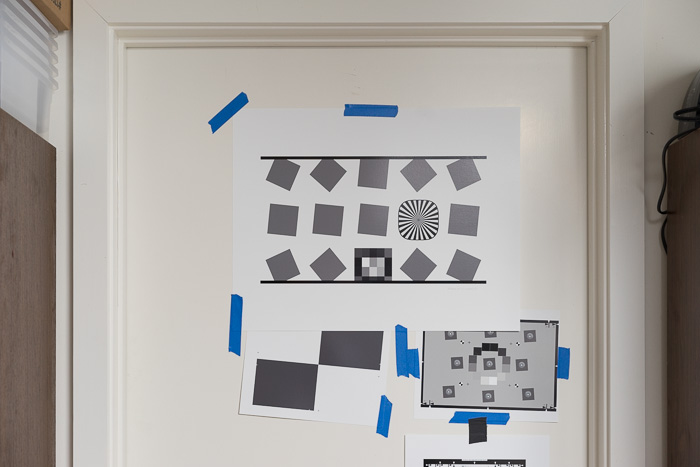
Not only that, I’m not using the whole target for the SFR analysis, just the square in the middle, immediately to the left of the Siemens star that I use for focusing. With the focus point and the measuring point so close to each other, alignment is not at all critical – I’ve checked – and the variations in position associated with handheld shooting has virtually no effect on the results. You could say that I’m not getting many measurements out of one shot, and you’d be right. But that’s not my goal in this handheld testing.
Leave a Reply