This is the 28th in a series of posts on the Hasselblad X2D 100C camera and the XCD lenses. You will be able to find all the posts in this series by looking at the righthand column on this page and finding the Category “X2D”.
In the last post, I reported on the statistics of the color errors resulting from shooting the Macbeth CC24 chart under eight conditions:
- X2D, Lr Classic, Adobe Standard Profile
- GFX 100S, Lr Classic, Adobe Standard Profile
- X2D, Lr Classic, Adobe Color Profile
- GFX 100S, Lr Classic, Adobe Color Profile
- X2D, Lr Classic Camera Standard Profile
- X2D, Phocus, Standard Profile
- X2D, Phocus, Repro Profile
- X2D, Phocus, Repro Low Gain Profile
If you haven’t already, please read that post. Otherwise this one may not make much sense to you.
In this post, instead of looking at the statistics of the color errors, I’ll show you errors for each patch. Color errors can be thought of as consisting of luminance (roughly, brightness) errors, and chromaticity (the part of color orthogonal to luminance, and consisting of hue and chroma (roughly, saturation). I’ll be ignoring the luminance errors, and showing only the chromaticity errors, in CIEL*a*b*. The color space I’ve chosen for this post is CIEa*b* chromaticity space. In this space, the horizontal axis is CIE b*, which, roughly speaking, runs from blues through neutrals to yellows. The vertical axis is CIE a*, which, roughly speaking, runs from greens through neutrals to reds. In some of the graphs, I’ve colored the presentations’ backgrounds to help you figure out what is where on the diagram.
This should get you oriented:
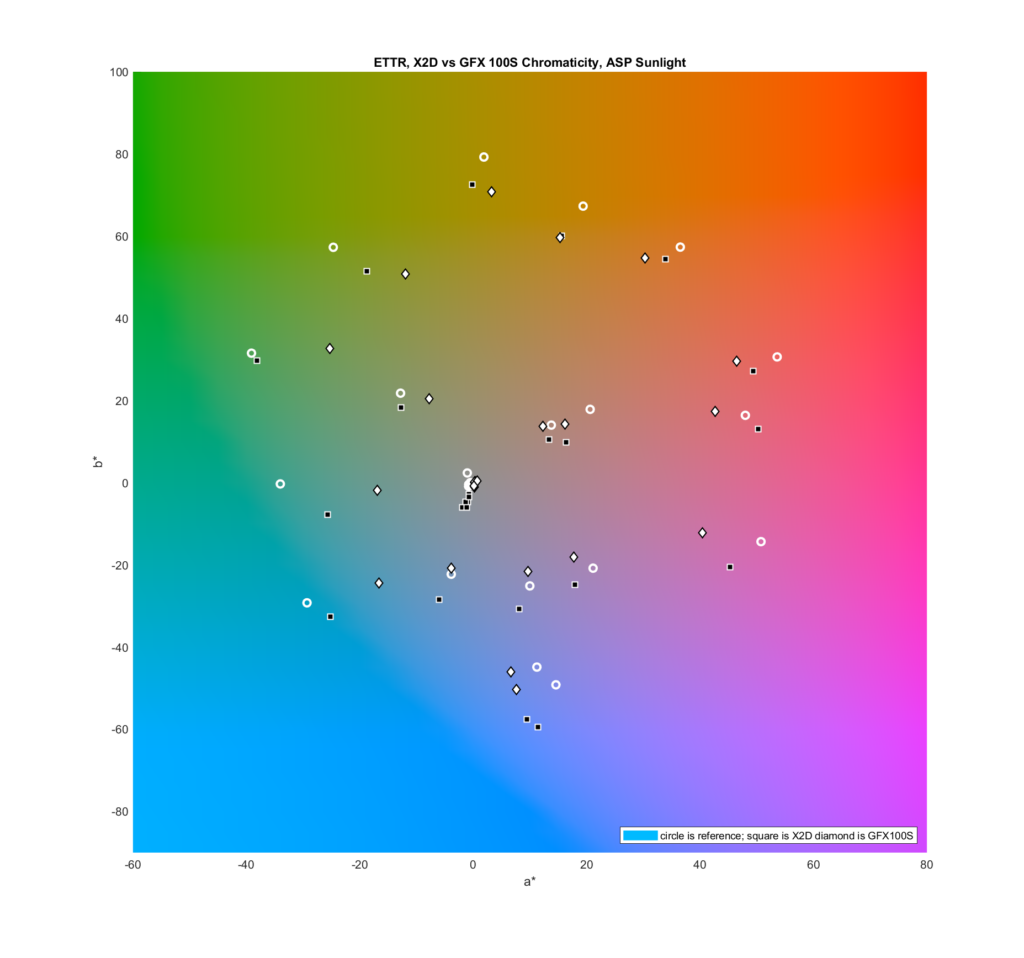
In the above chart, we’re looking at three sets of 24 points, each point representing one patch on the Macbeth CC24 target. The first set, represented by the circles, are the actual values from the patches, measured by me a little over two years ago. The squares are the chromaticities produced from a Hasselblad X2D sunlit full exposure, after development in Lightroom with Adobe Standard Profile. The diamonds are the chromaticities produced from a Fuji GFX 100S sunlit full exposure, after development in Lightroom with the same profile.
There’s a lot of information in the above graph, but first let’s look at some simpler ones which consider only one camera and development method at a time.

The red dots are the correct values for the patches. The green ones are the chromaticities produced from a Hasselblad X2D sunlit full exposure, after development in Lightroom with Adobe Standard Profile.
The cluster of 12 points near the origin are from the 6 gray patches on the Macbeth CC24. In this case, the reference and actual values are quite close to each other, indicating good neutral-axis performance for the camera and development combination. The Caucasian skin tone patches are at about 20,20. One of them has a quite pronounced shift towards orange. This is likely deliberate, to make sure there aren’t greenish or bluish skin tones, which are unappealing. One of the blue patches at 20,-50 is shifted towards cyan, which is usual (people don’t like purple skies). The other is shifted toward purple which is not something I see a lot.
Now let’s look at and X2D image with Adobe Color Profile, which, as we saw in the previous post, is a bit more accurate for the X2D with this lighting.
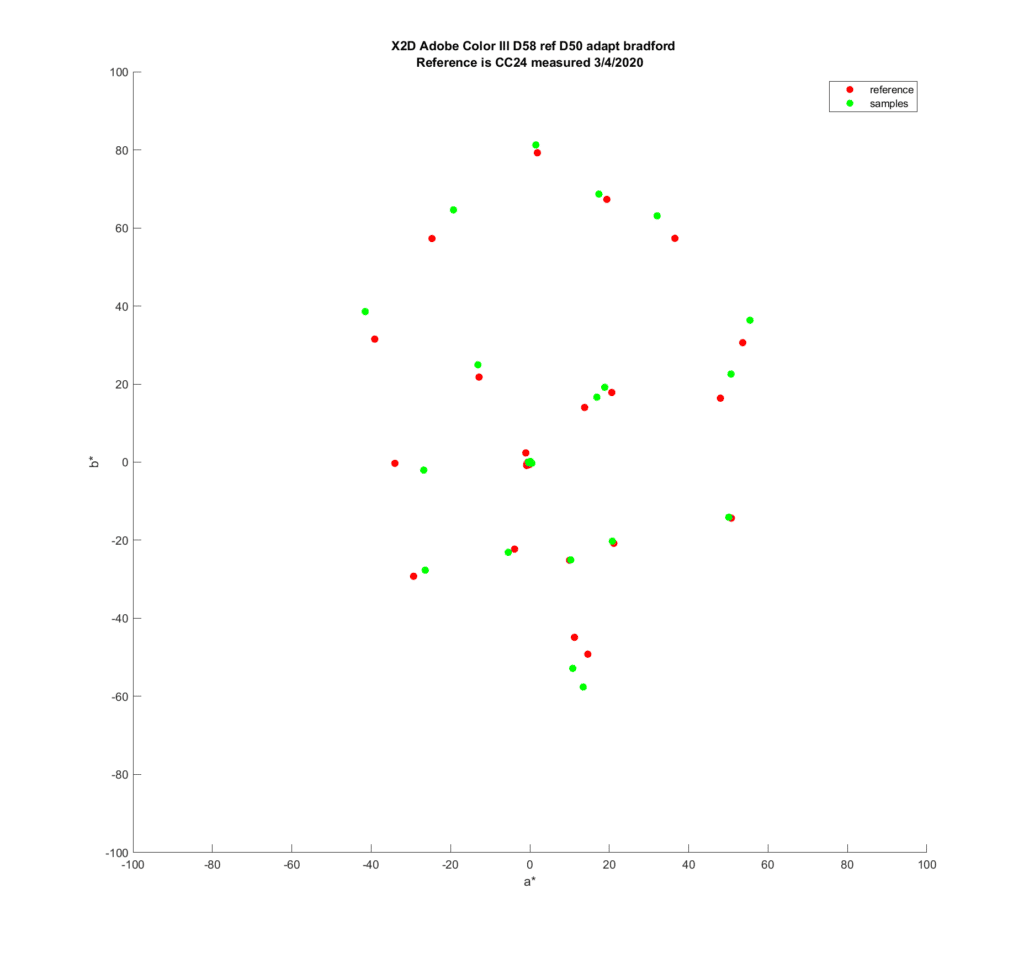
In this one, the chromatic blues at 20,-50 are shifted the way I expect to see them moved. The Caucasian skin tone shift towards orange is about half of what it was with Adobe Standard. Neutrals are very tightly grouped.
Now, Camera Standard Processing, which is supposed to approximate the Standard processing in Phocus:
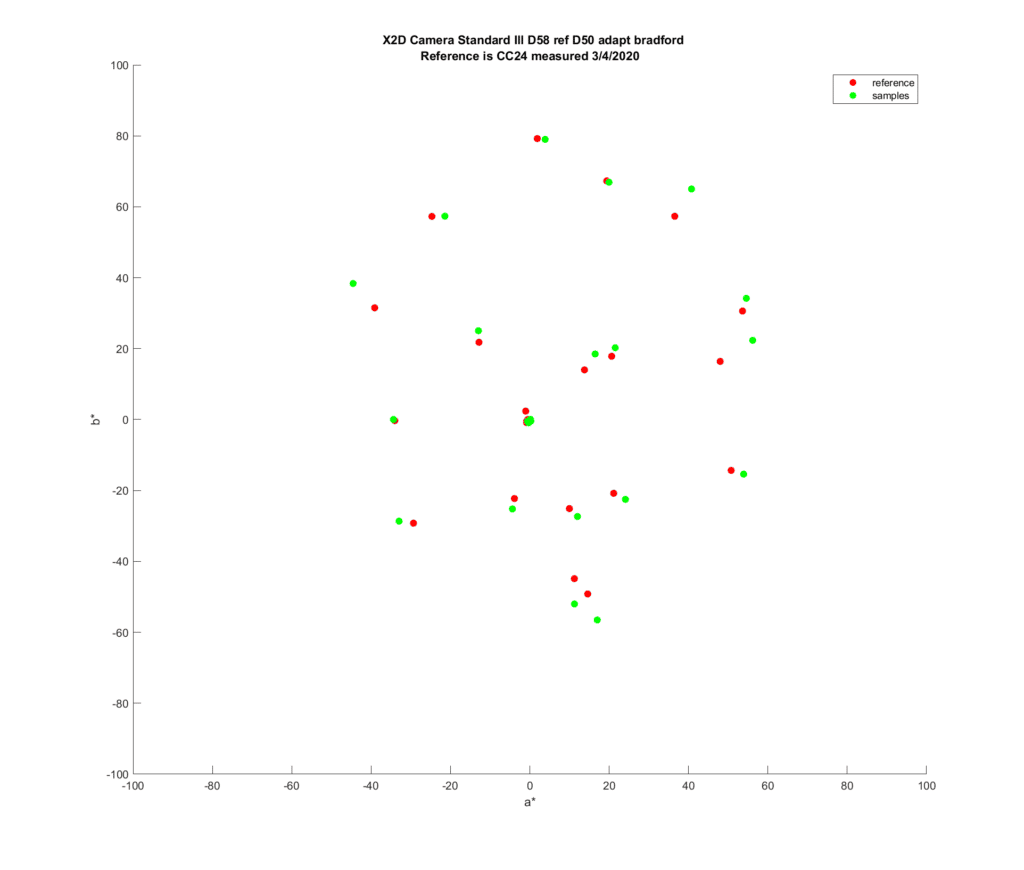
This, too, looks very good.
And, for completeness, development in Phocus with the Standard treatment:
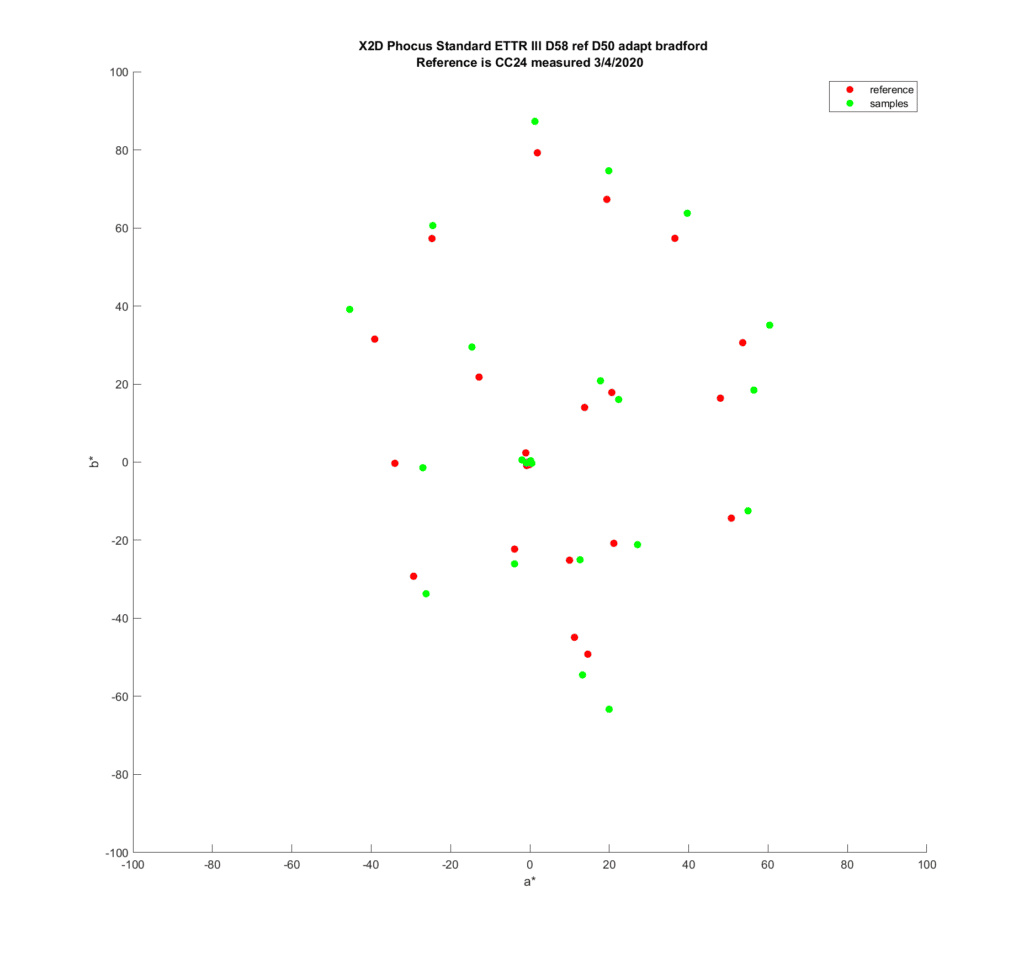
The sky blue shifts are more aggressive than with Camera Standard. So is one of the Caucasian skin tone shifts. There is more chroma in the upper right quadrant.
Now let’s do a direct comparison of Adobe Color Profile and Camera Standard Profile.

Most of the differences are small. A few are not: the saturated orange patch, one of the red patches, the cyan patches. The Caucasian skin tone shifts on both patches are more consistent with Phocus.
Leave a Reply