the last word

Photography meets digital computer technology. Photography wins -- most of the time.

  • site home
  • blog home
  • galleries
  • contact
  • underwater
  • the bleeding edge
You are here: Home / The Last Word / Refining the a7RII battery current measurements

Refining the a7RII battery current measurements

November 9, 2016 JimK Leave a Comment

This is a continuation in a series of posts on power consumption in the Sony a7RII. The more recent incarnation of the series starts here.

I reported on my battery current measurement setup here. In the last few days, I’ve refined it somewhat, and I’d like to document what I’m doing here, because my techniques is settling down, and I will probably be using it in the future. It seems to have application well beyond figuring out how to maximize the a7RII battery life. Looking at the details of the current flow from the camera battery to the camera itself provides a window into the internal operations of the camera that has revealed interesting details and can serve as the basis for future tests. For example, I can now accurately measure the time the camera takes to acquire focus in autofocus mode under various conditions.

I should warn you all that understanding what I’m doing from the iamges that I’m about to show you requires an elementary knowledge of electronics and electrical circuits. If that is not in your background, maybe you should accept my results on faith (or not) and move on to the next post.

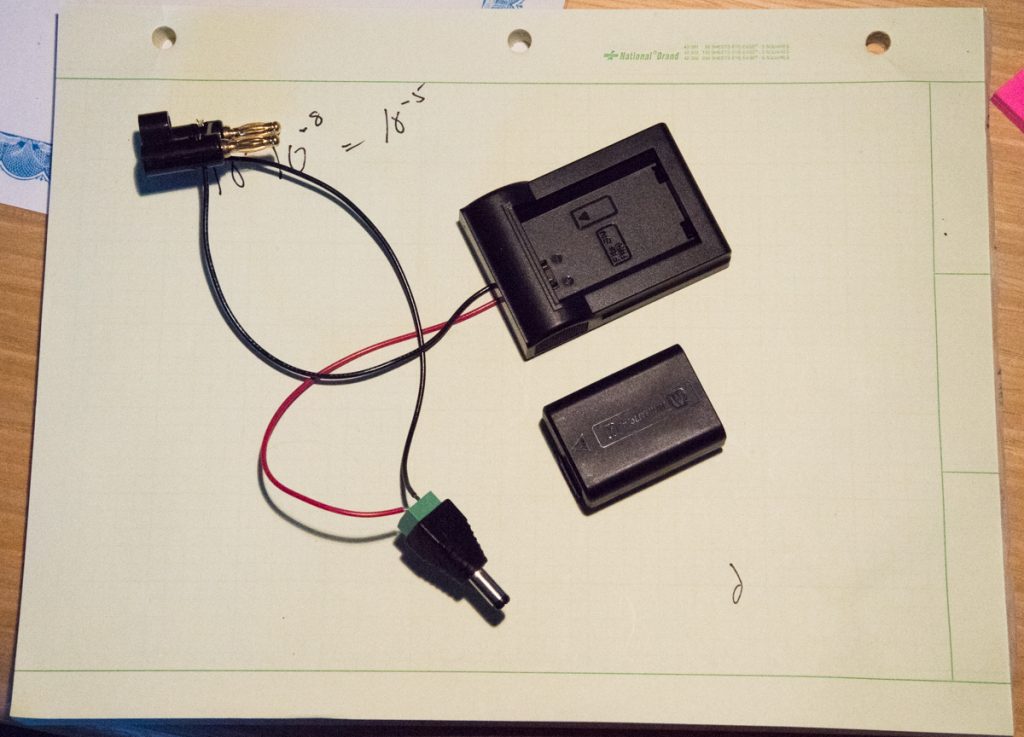
Here’s the first thing that is new. I’ve taken a Wasabi battery charger, and ripped off the battery holder and soldered a couple of wires to it. I’ve run the (red) wire from the positive terminal to an adapter that plugs into the battery replacement of an as power supply for the a7x cameras. I’ve taken the (black) wire from the negative battery terminal and run it to a GR (3/4 inch double banana) plug. The other side of that plug goes to the negative terminal of the adapter and thence to the camera:

_d519057

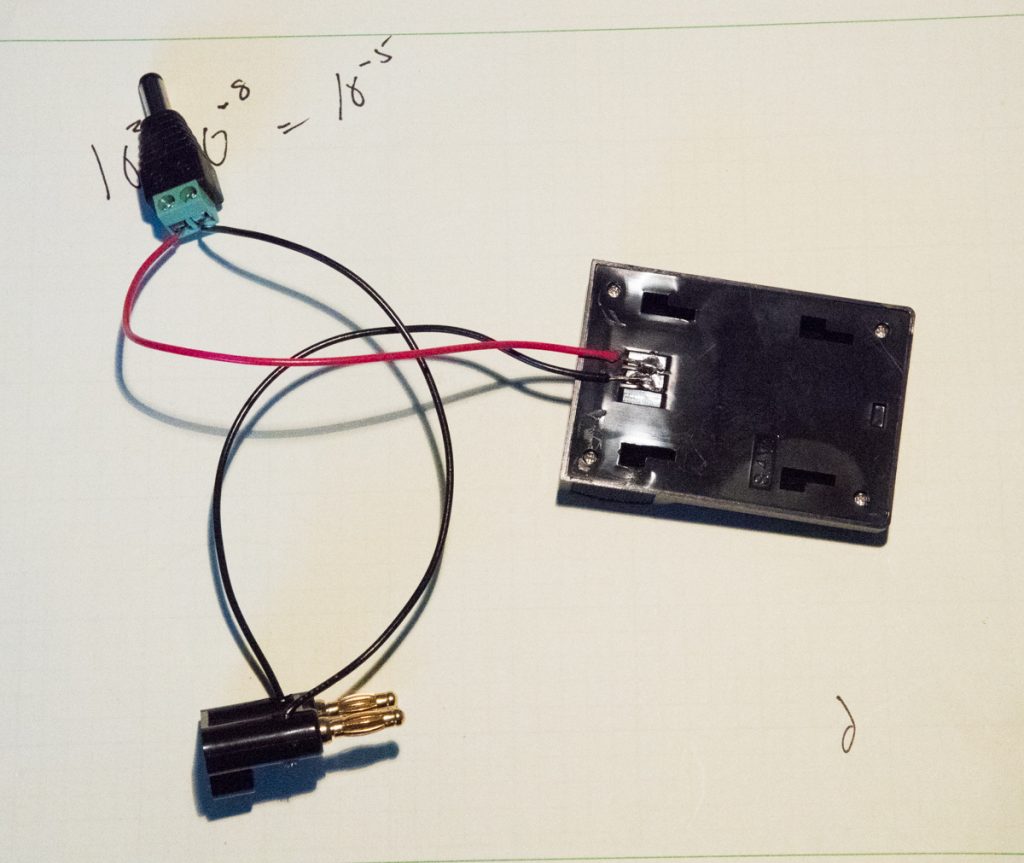
Turning the Wasabi part over, you can see the side of it that may be familiar to you:

_d519051

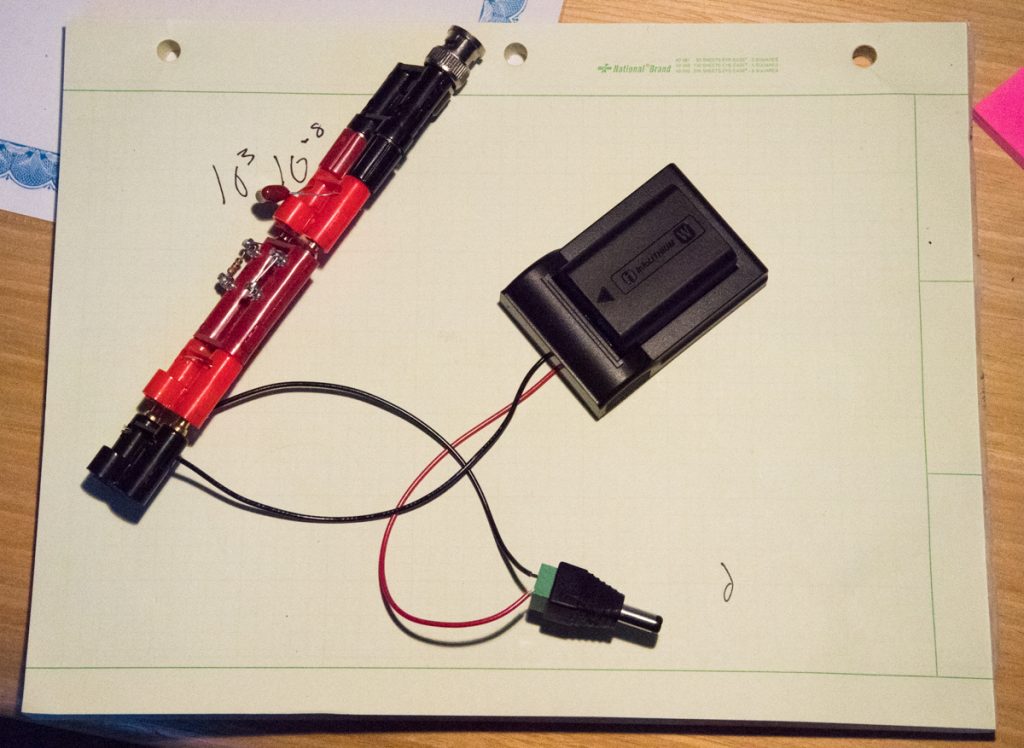
I’ve also revised the part that plugs into the GR plug the you can see above. The stack now looks like this:

_d519054

Proceeding from right to left, we have a 0.1 ohm nichrome wire shunt, a 1 K ohm resistor in series with the high side of the shunt, a 0.01 microfarad capacitor to provide a 10 microsecond lowpass filter, and finally a GR-to-BNC adapter. The BNC end of the adapter plugs into the oscilloscope. The tabs on the GR plugs indicate the ground side.

Put the parts together and we have an assembly that looks like this:

_d519046

Moving over to the bench where the testing occurs:

_d519061

_d519090

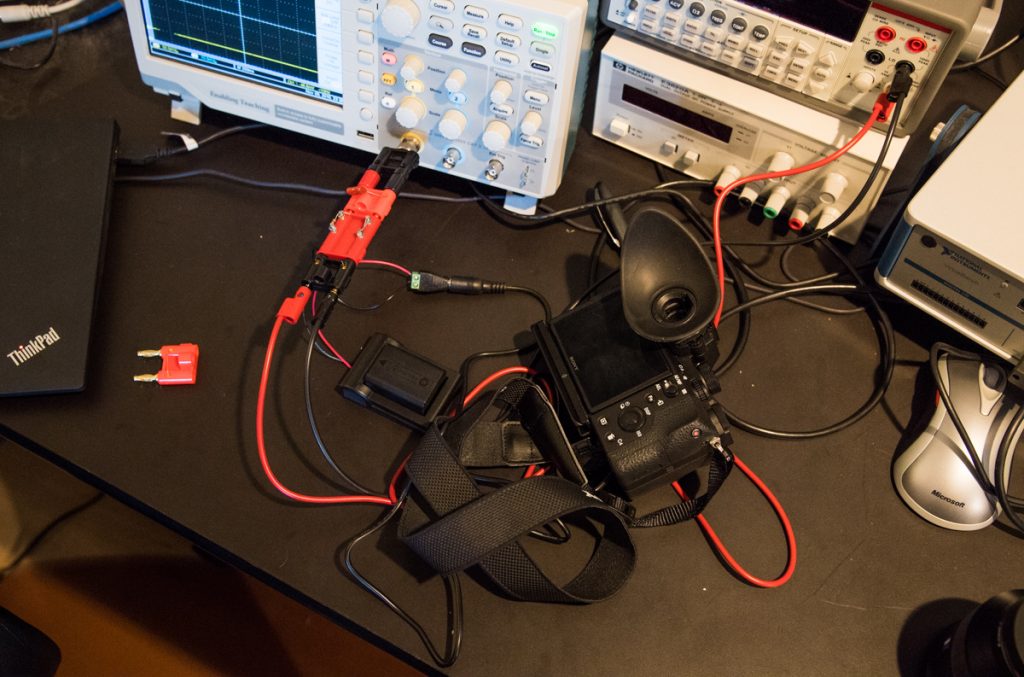
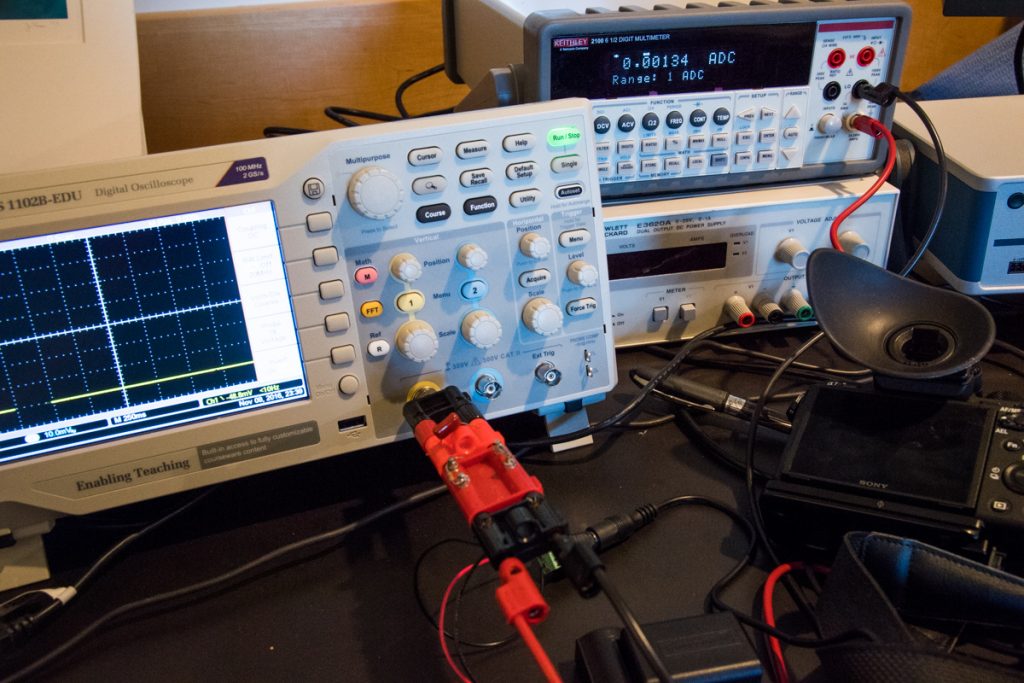
We see the camera on the right, the scope on the left, and the Keithley 2100 digital multimeter (DMM) that I use for accurate, but slow, current measurements. In this setup, the DMM provides the shunt resistance, so the 0.1 ohm nichrome shunt is not used. 

If we back up a bit, it looks like this:

_d519084

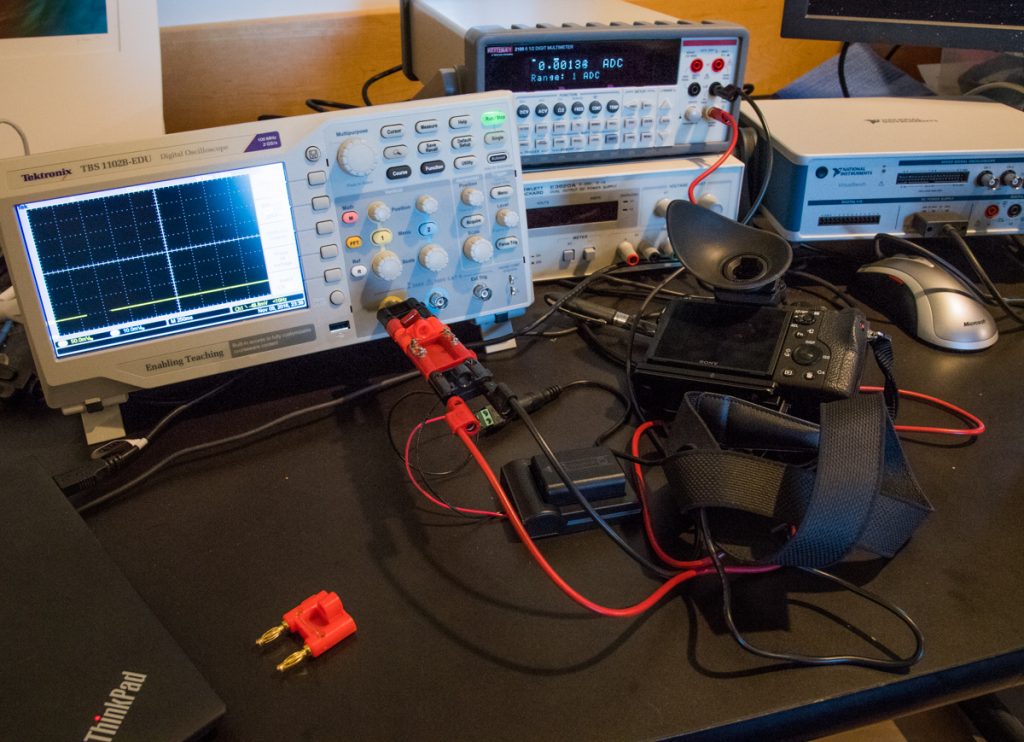
You can see a bit of the computer used to capture the data on the lower left, with the unused 0.1 ohm shunt next to it. The DMM is sitting on an hp power supply, which I used with a somewhat different collection of hardware when I don’t want to use an actual battery. I don’t do this much, because the power supply is only rated to deliver one amp, and, with the shutter in operation, the camera draws more than that. I may throw a big capacitor across the power supply terminals in the future, but for now I’m using the real battery. All of the things I’ve shown you so far have been done using the real battery.


The Last Word

← Sony a7RII IBIS current draw revisited Sony a7RII battery current when charged through USB port →

Leave a Reply Cancel reply

Your email address will not be published. Required fields are marked *

March 2023
S M T W T F S
 1234
567891011
12131415161718
19202122232425
262728293031  
« Jan    

Articles

  • About
    • Patents and papers about color
    • Who am I?
  • Good 35-70 MF lens
  • How to…
    • Backing up photographic images
    • How to change email providers
  • Lens screening testing
    • Equipment and Software
    • Examples
      • Bad and OK 200-600 at 600
      • Excellent 180-400 zoom
      • Fair 14-30mm zoom
      • Good 100-200 mm MF zoom
      • Good 100-400 zoom
      • Good 100mm lens on P1 P45+
      • Good 120mm MF lens
      • Good 18mm FF lens
      • Good 24-105 mm FF lens
      • Good 24-70 FF zoom
      • Good 35 mm FF lens
      • Good 60 mm lens on IQ3-100
      • Good 63 mm MF lens
      • Good 65 mm FF lens
      • Good 85 mm FF lens
      • Good and bad 25mm FF lenses
      • Good zoom at 24 mm
      • Marginal 18mm lens
      • Marginal 35mm FF lens
      • Mildly problematic 55 mm FF lens
      • OK 16-35mm zoom
      • OK 60mm lens on P1 P45+
      • OK Sony 600mm f/4
      • Pretty good 16-35 FF zoom
      • Pretty good 90mm FF lens
      • Problematic 400 mm FF lens
      • Tilted 20 mm f/1.8 FF lens
      • Tilted 30 mm MF lens
      • Tilted 50 mm FF lens
      • Two 15mm FF lenses
    • Found a problem – now what?
    • Goals for this test
    • Minimum target distances
      • MFT
      • APS-C
      • Full frame
      • Small medium format
    • Printable Siemens Star targets
    • Target size on sensor
      • MFT
      • APS-C
      • Full frame
      • Small medium format
    • Test instructions — postproduction
    • Test instructions — reading the images
    • Test instructions – capture
    • Theory of the test
    • What’s wrong with conventional lens screening?
  • Previsualization heresy
  • Privacy Policy
  • Recommended photographic web sites
  • Using in-camera histograms for ETTR
    • Acknowledgments
    • Why ETTR?
    • Normal in-camera histograms
    • Image processing for in-camera histograms
    • Making the in-camera histogram closely represent the raw histogram
    • Shortcuts to UniWB
    • Preparing for monitor-based UniWB
    • A one-step UniWB procedure
    • The math behind the one-step method
    • Iteration using Newton’s Method

Category List

Recent Comments

  • Mal Paso on Christmas tree light bokeh with the XCD 38V on the X2D
  • Sebastian on More on tilted adapters
  • JimK on On microlens size in the GFX 100 and GFX 50R/S
  • Kyle Krug on On microlens size in the GFX 100 and GFX 50R/S
  • JimK on Hasselblad X2D electronic shutter scan time
  • Jake on Hasselblad X2D electronic shutter scan time
  • Piotr Chylarecki on Who am I?
  • JimK on Who am I?
  • Piotr Chylarecki on Who am I?
  • Stefan on Swebo TC-1 OOBE

Archives

Copyright © 2023 · Daily Dish Pro On Genesis Framework · WordPress · Log in

Unless otherwise noted, all images copyright Jim Kasson.